|
5/28/2015 0 Comments Frozen: team HansI've been watching the first half of Frozen a lot lately, since my son figured out how to open and start the digital copy on our iPad (but he loses interest after the summer song). And you know what? Hans isn't really that terrible. He may have had evil intentions, but his actions weren't evil to begin with. What did he really do aside from voice his inner dialogue? He DID provide for the city of Arondale. He was a better leader than secluded Elsa or sheltered Anna. He had every right to imprison Elsa, and it's what a good leader would have done.  A good leader  He listened to Anna, and they exchanged stories about their pasts. They really did connect, even if Hans didn't fall in love with her for realsies.  Elsa rejected Hans without even giving him a chance.  SHE attacked HIM, after all.   Pretty much all politicians.
0 Comments
5/28/2015 0 Comments Baby clothes from free patterns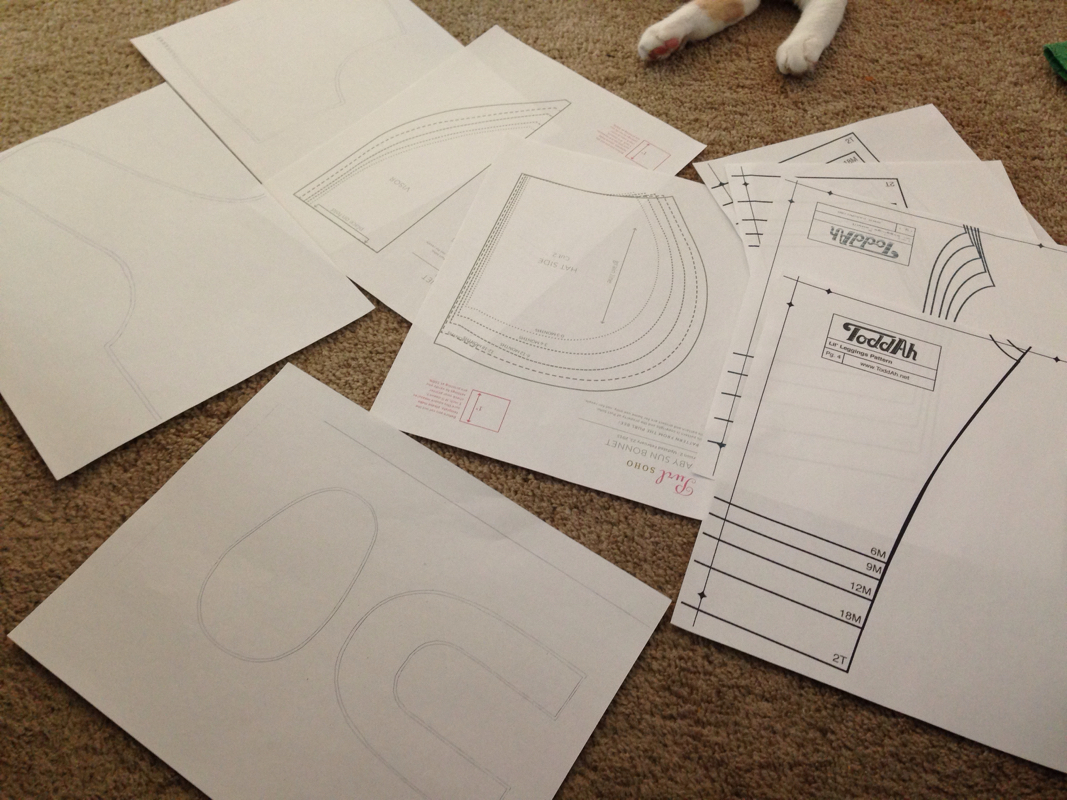 http://www.purlbee.com/wp-content/uploads/2014/04/Baby_Sun_Bonnet_Template_V2.pdf http://toddah.net/wp-content/uploads/2014/08/ToddAh_LilLeggingsPatterns.pdf I made one thing, but was skeptical and didn't take pics. But it turned out nicely and now I don't have pictures to show the process. I'll work on it for the next item. This is very much still "in progress" but got stuck in the closet for the time being. 5/28/2015 0 Comments Making a patternI'm always ready for a new sewing project, scouring Pinterest for just the right thing. There's a plethora of free patterns available. One issue is finding things in just the right shape, size, style. If you have something you love already, or you know it fits well, making a pattern from it can be the best solution. There's less risk of putting work in just to discover the shape isn't right. I recently found a pattern on Pinterest for cloth pull ups. My son is just about that potty training age and I'm ready to get a move on. But I'll go into a rant about potty training later. My printer is completely out of ink, and I already own one pair of Gerber pull ups I bought from Meijer. So in a pinch and a fit of impatience, I made my own. The first step is to inspect whatever you want to make. Look at seams. See how many parts there are. 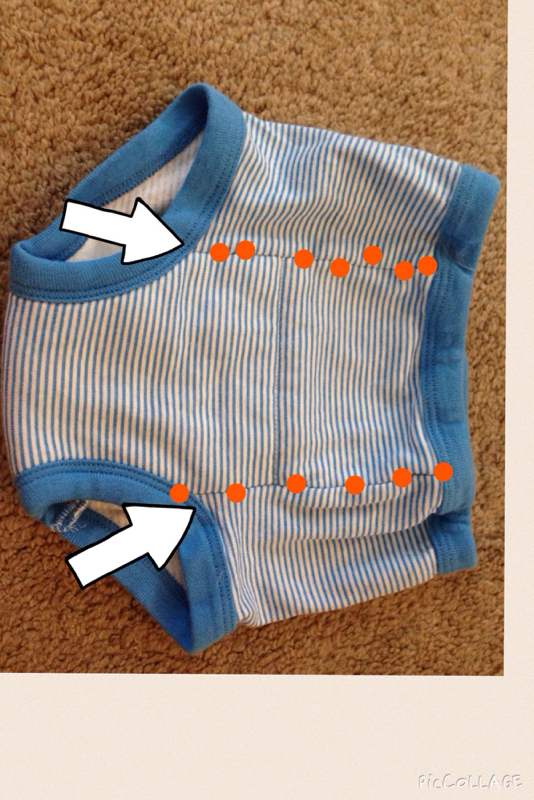 Front seams 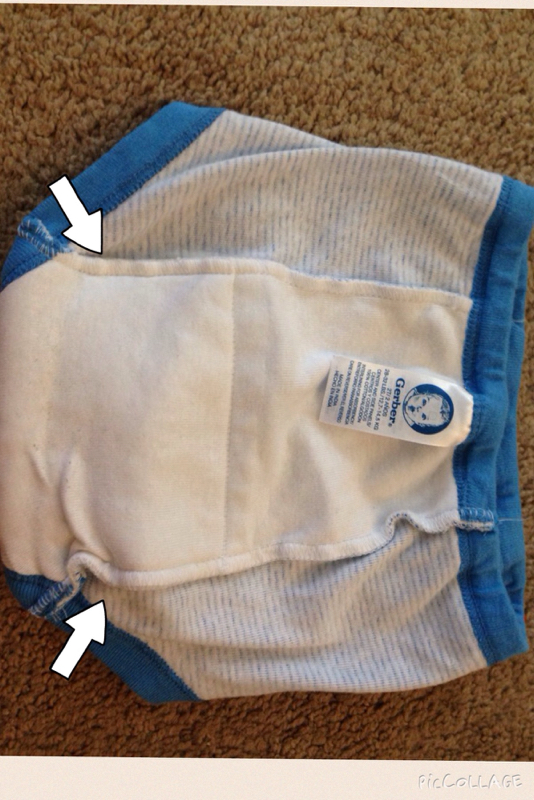 Back seams  Side panel 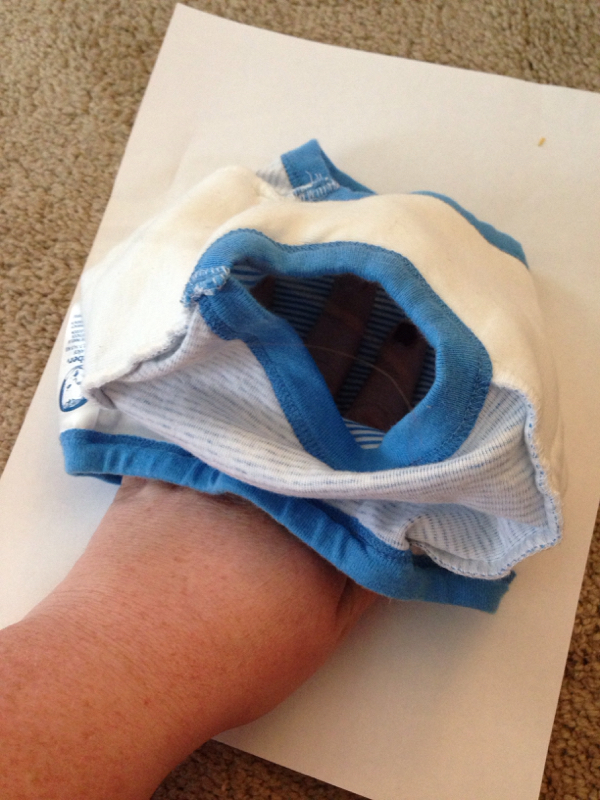 Smooth flat  Stretch flat and smooth to the seam 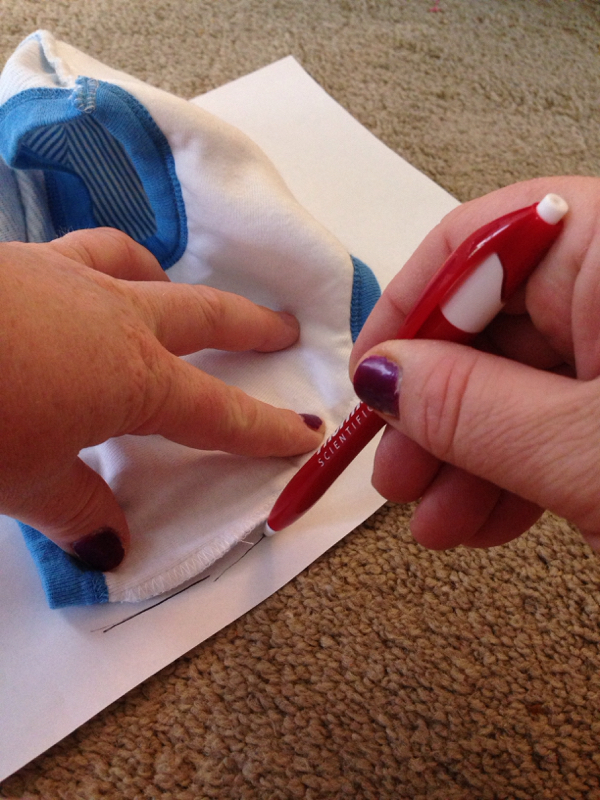 Trace the edge 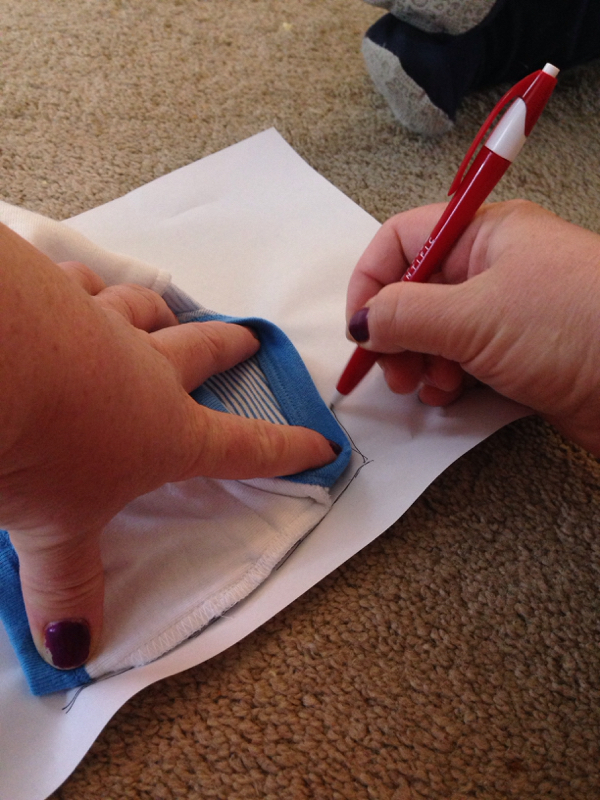 Keeping your side matched up, smooth out from the drawn seam, and draw the next seam 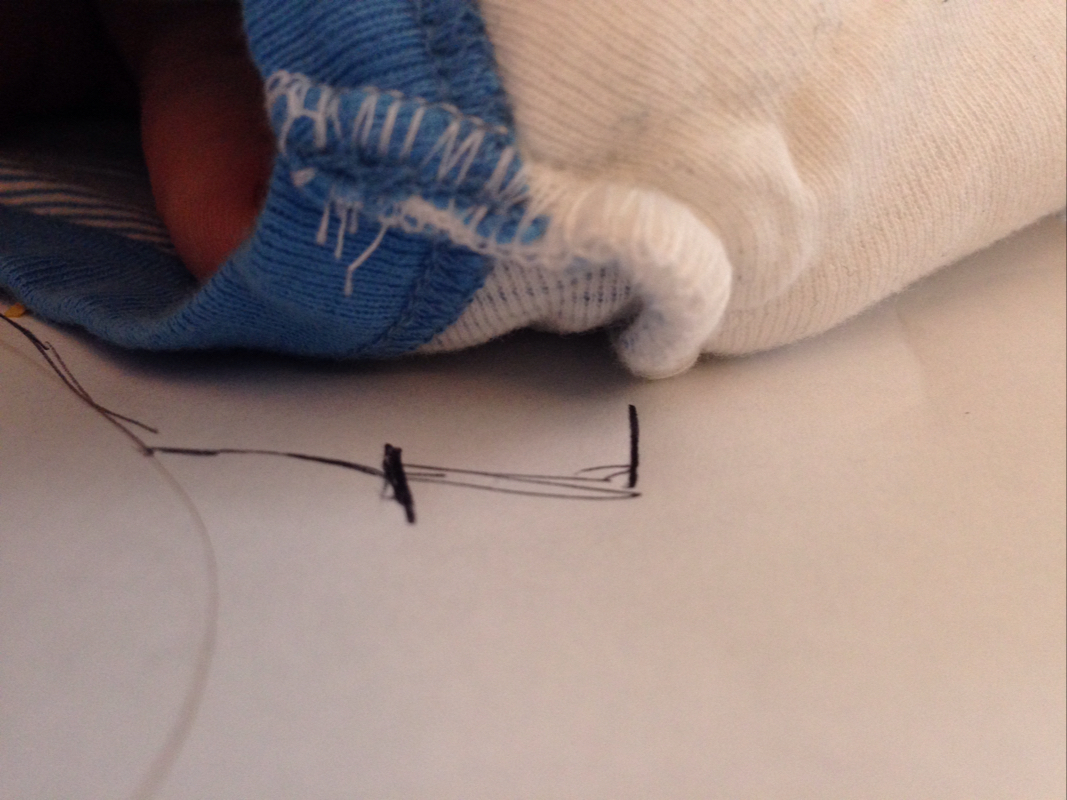 I made a notch for the waistband 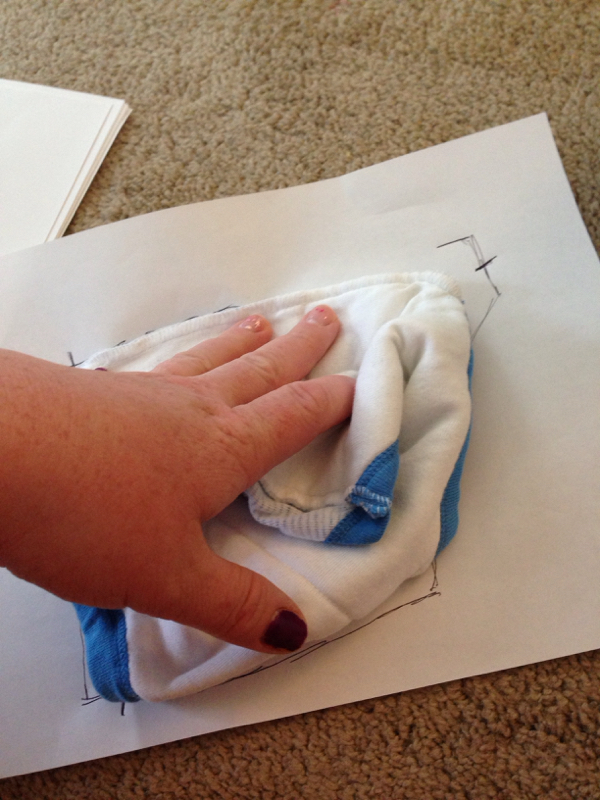 I smoothing just the bottom segment of fabric, pressing out from different direction, and lining up the opposite side seam 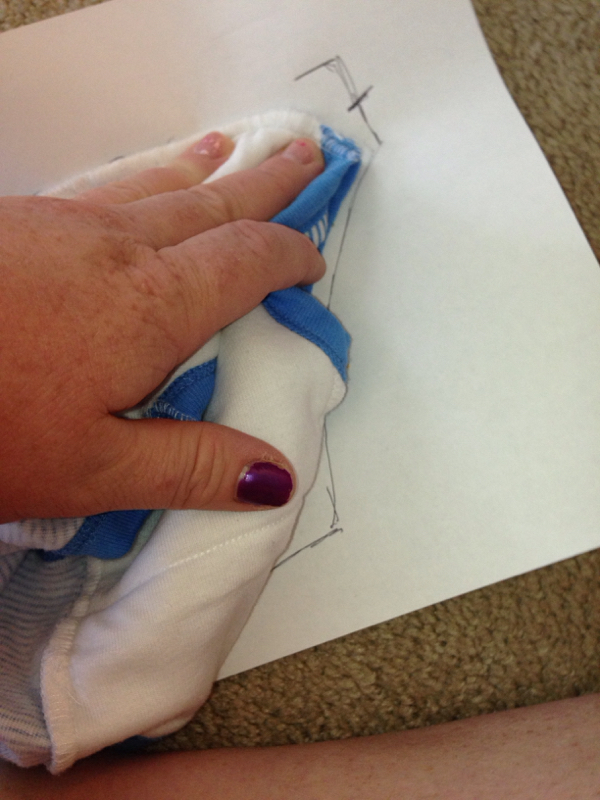 Checking the side seam from another angle 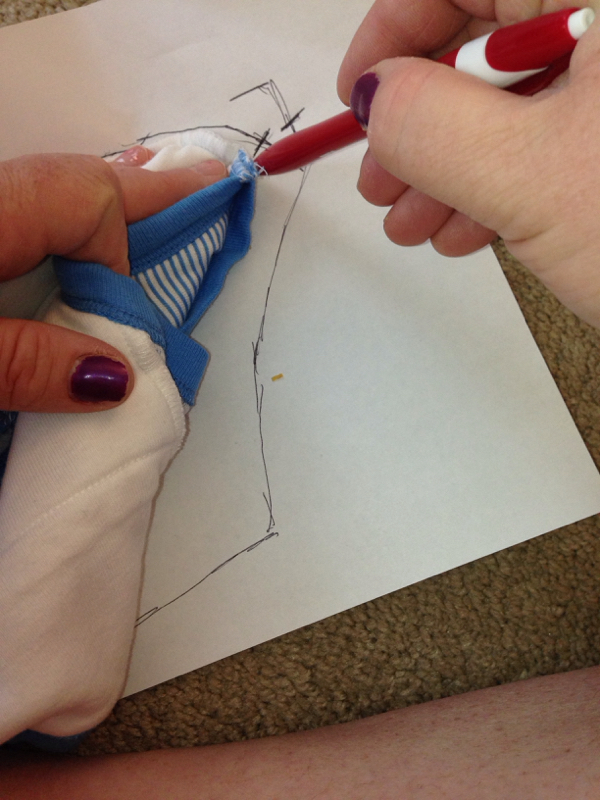 Correcting errors if needed 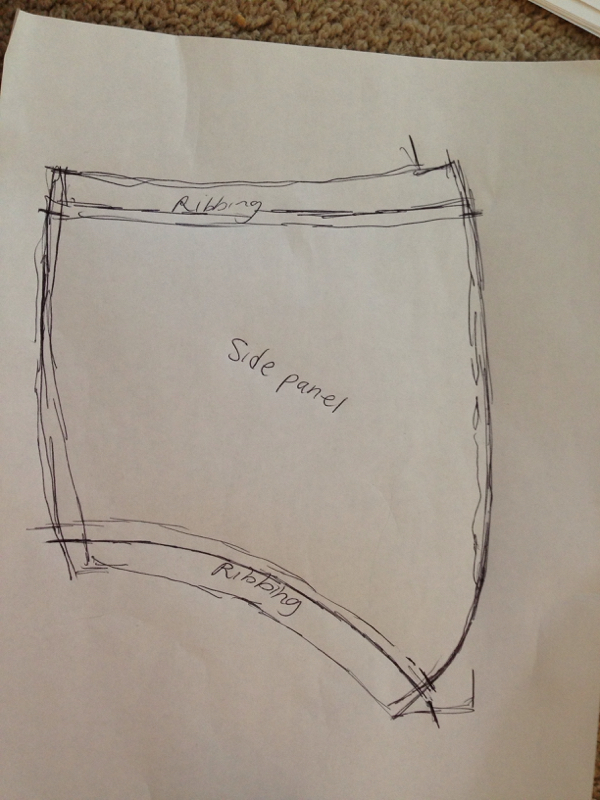 Smoothing out the lines for a final pattern piece. 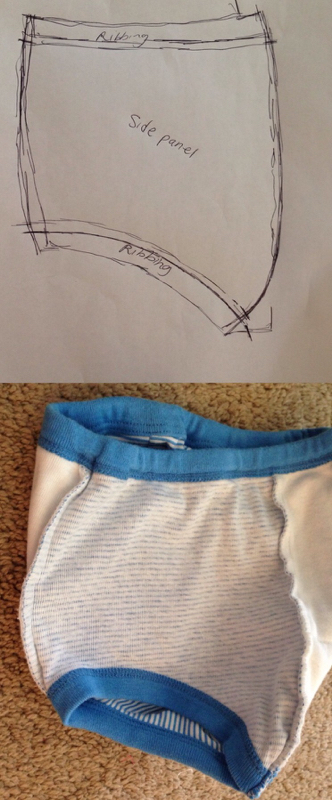 Comparing the pattern to the original it looks consistent. I think that's close enough to call it a pattern. Smooth any edges or inconsistencies. In this case, approximate is good enough. 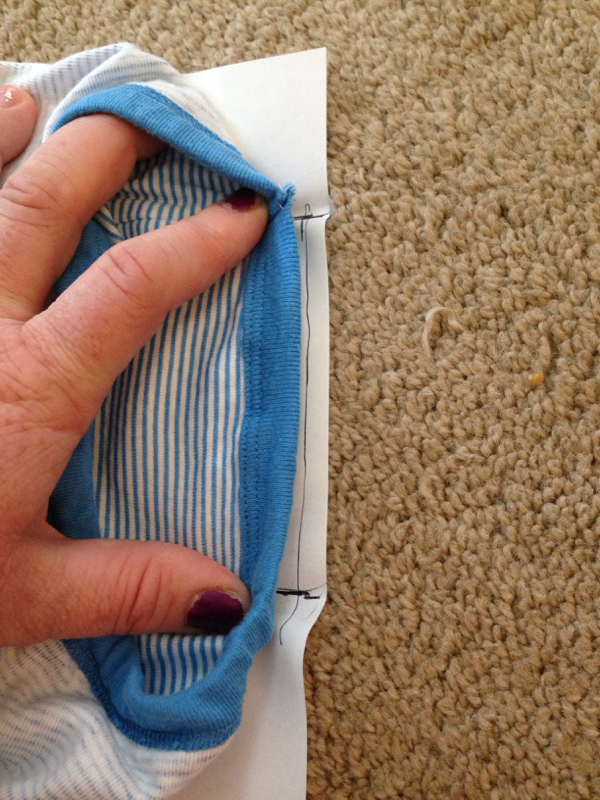 Started at the back seam 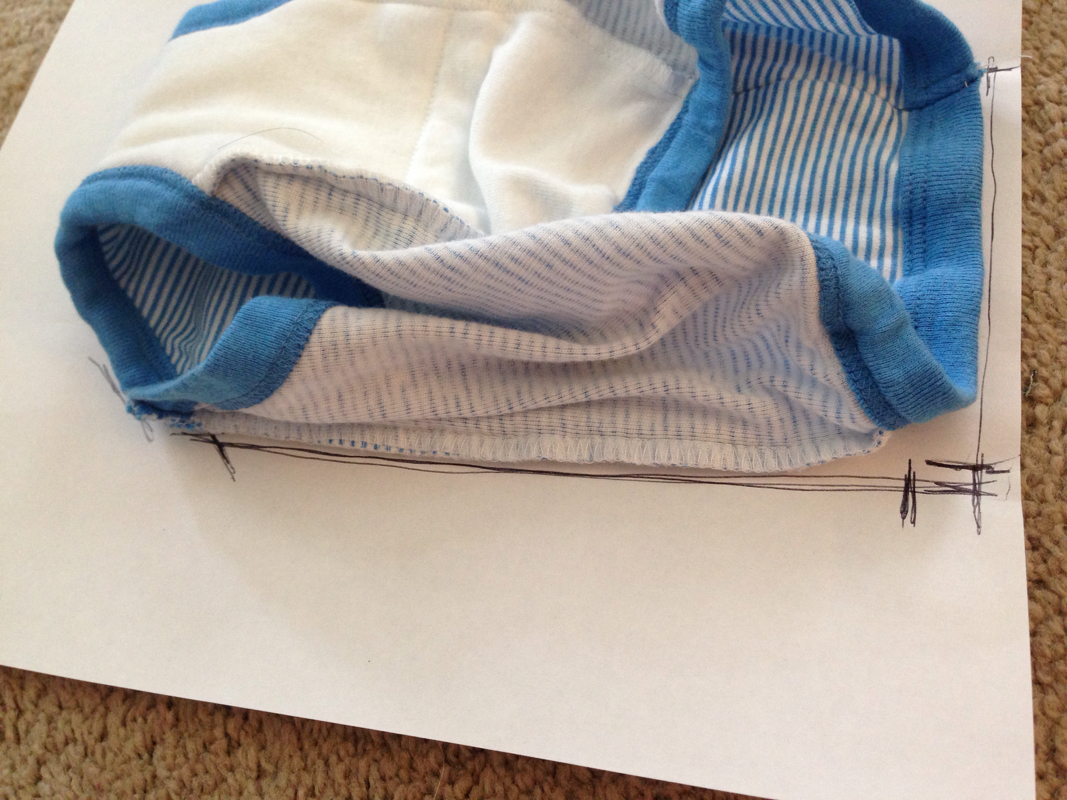 Folded edges in to center to expose seams 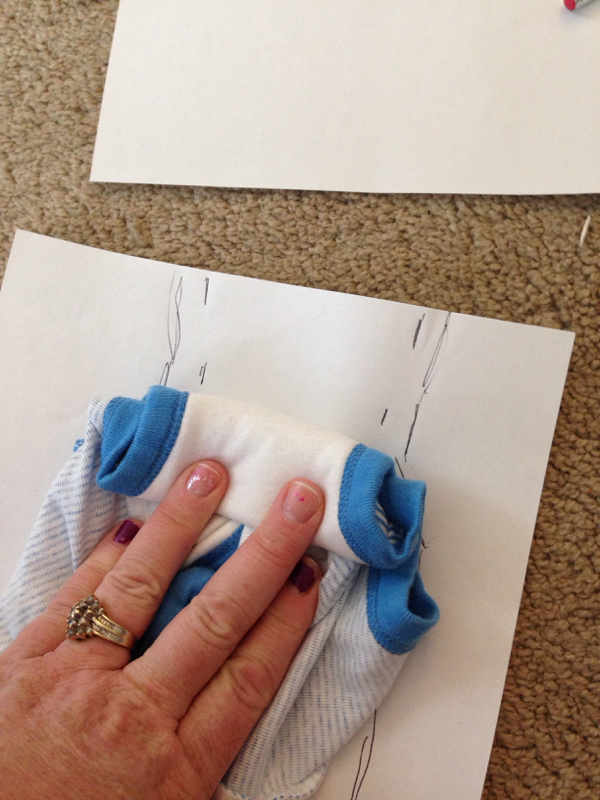 Trace both sides until I'm out of paper 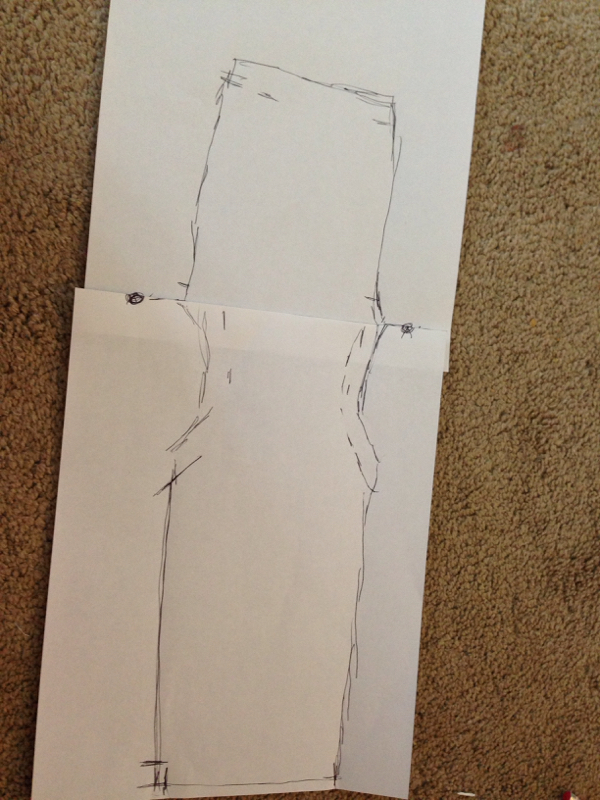 I marked the edge of the paper with dots, then later stapled, but really it's just a matter of keeping something from shifting as you trace it.  This is what I deal with any time I craft on the floor.  They both like to roll on paper and fabric. Anytime you spread something out in front. 5/8/2015 0 Comments Ombre hairMy daughters gotten to the age where we can start to experiment and play, and let her express herself through her hair. She actually doesn't seem to care much about her appearance, but is periodically opinionated. This was one of the miraculous occasions she seemed really interested. I love fussing with hair and I'm grateful she let me do anything at all. I tell her I'm willing to be her personal daily hair stylist, and I'll make her fabulous everyday, but she just rolls her eyes. It's a mother/daughter teen thing, I guess. So anyways: OMBRÉ! 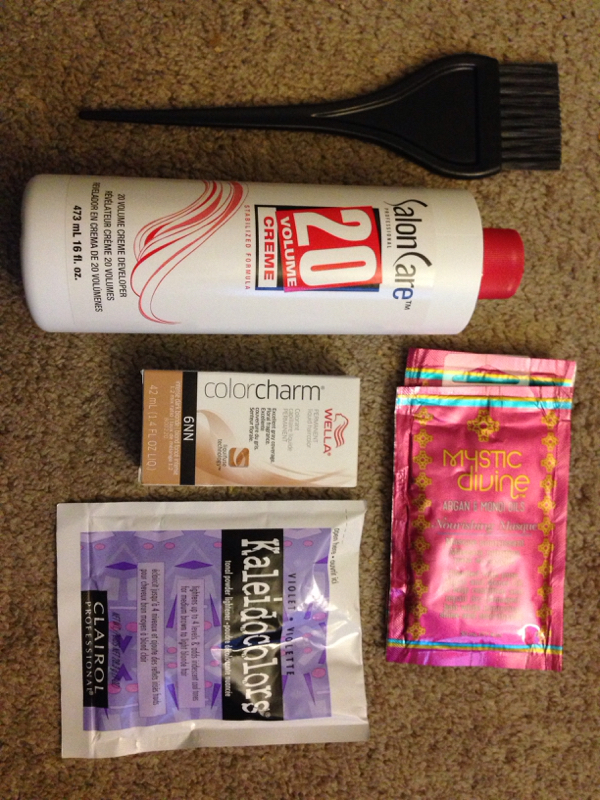 Brush Developer Dye for roots/base Bleach Deep conditioning packets 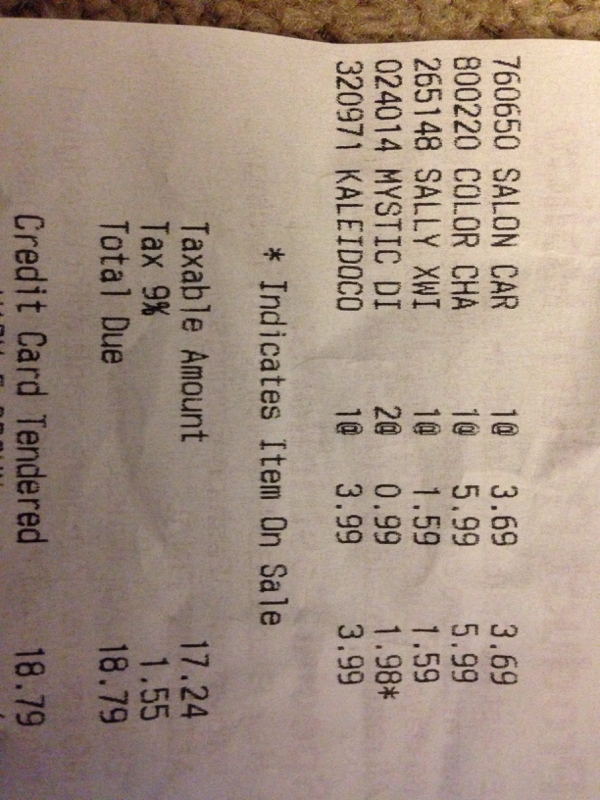 Total: $18.79 This is exactly what we got. We decided to give her an all over dark blonde first, so the blonde ombré would really pop. And the deep conditioning was just because I know bleach can really dry out your hair. But if we had been looking for just the basics, we could have gotten away with just the developer and bleach.  One part dye, two parts developer I didn't have a proper tool to measure developer, and when it came time to mix I wasn't sure how to make sure I had equal parts. So I poured out the dye into the mixing container, refilled it with water, and tested a shot glass to see how equal they were. Which it turns out, they were just about the same. So I added 2 shots of developer to the bowl. That's a simple thing to overlook, and it took me a minute to figure out how to deal with it. 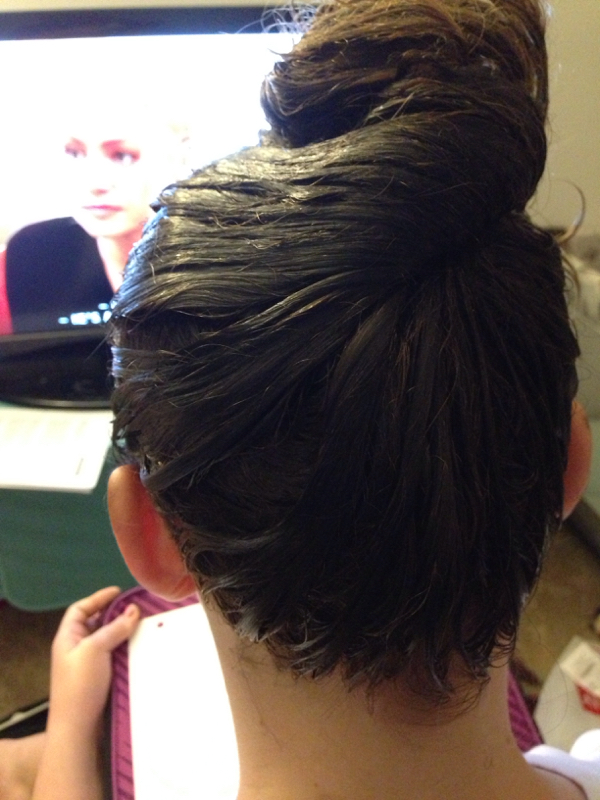 Barely enough 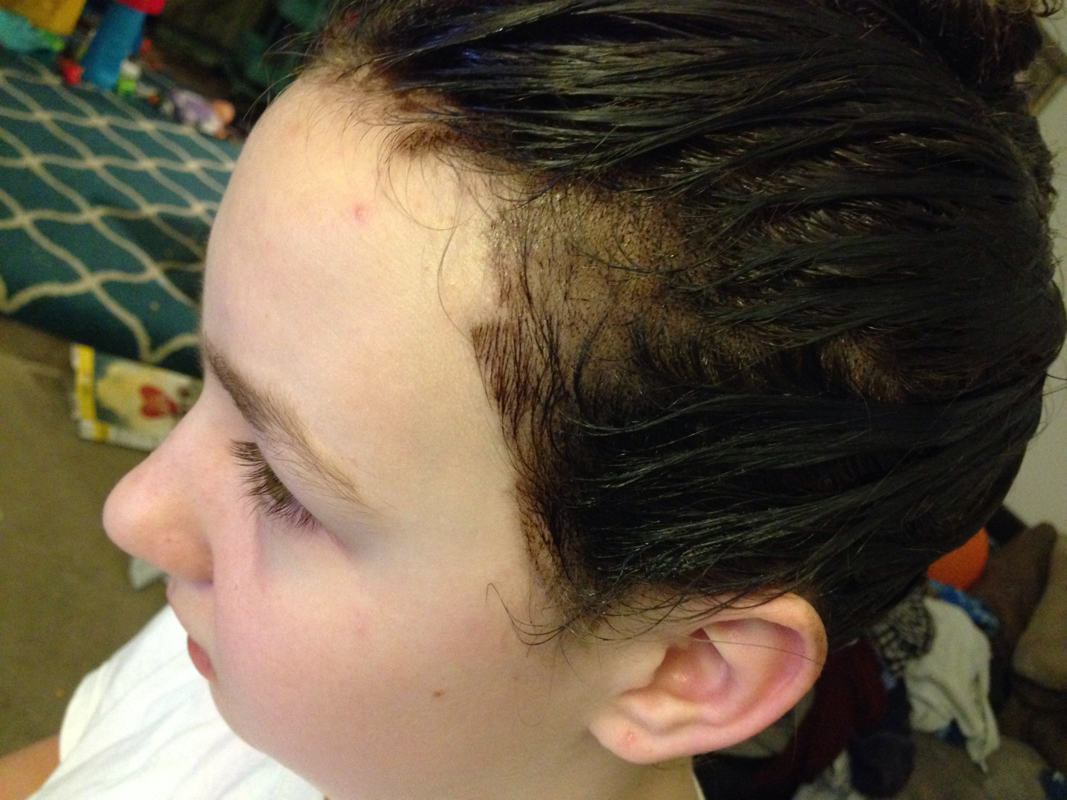 I tapered off towards the end, because we barely had enough dye for her long hair, and I was planning on bleaching the ends anyways. Next time I think I would splurge for a second bottle of dye though. We multitasked with a good Netflix marathon. 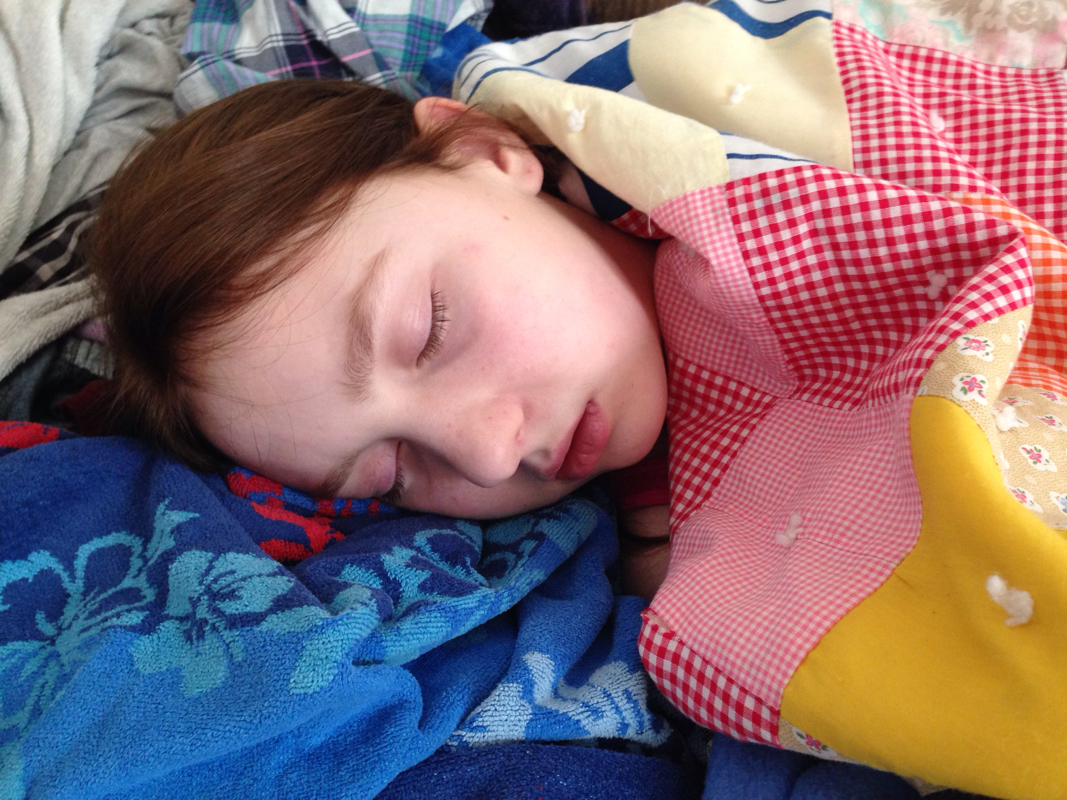 Sleeping beauty By the time we finished, it was late and we decided to save the bleach for the next day. This is the only picture I took of just the brown. 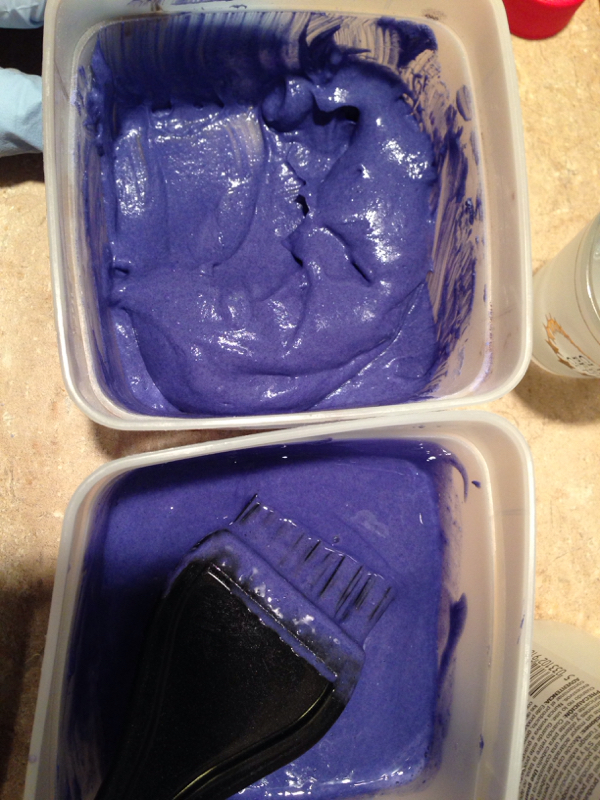 I looked up several ombré tutorials. Bleach needs two things to develop: potency of mixture, and time. So if you want it light, you make sure the bleach is mixed properly, and you leave it in a long time. My biggest concern was ending up with a line across her head, and not blending appropriately. So I had a few options. One was Staggering when I put bleach on, and doing the tips first and working upward after time as passed. Another was working with a second mixture of bleach that had water in it to weaken its potency. As you can see in the picture, I have a full strength bleach and weak bleach. I also decided to go for a "paint" on free-style highlighting method, rather than foils. The reason for my choice was I thought it would be easier to control and go back, and I know I've fumbled with foils in the past. This way I could watch the lightening more closely as well. 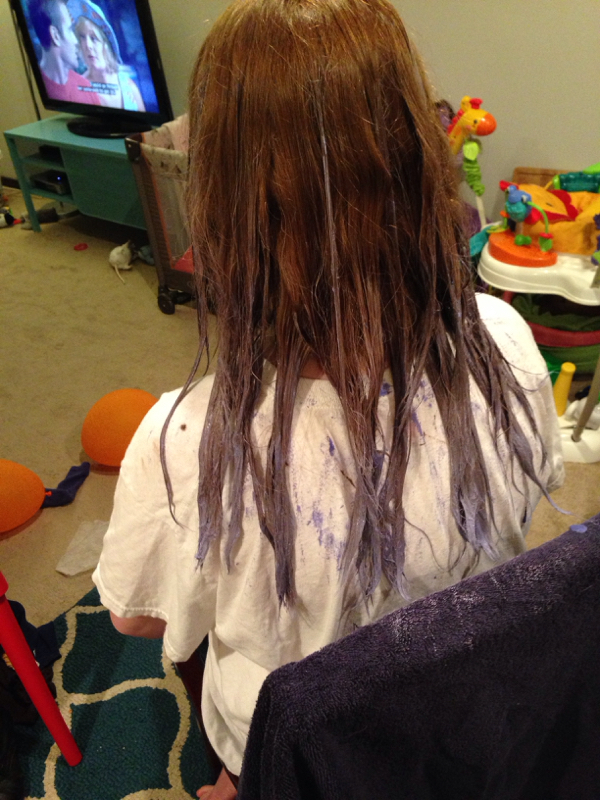 Half way up 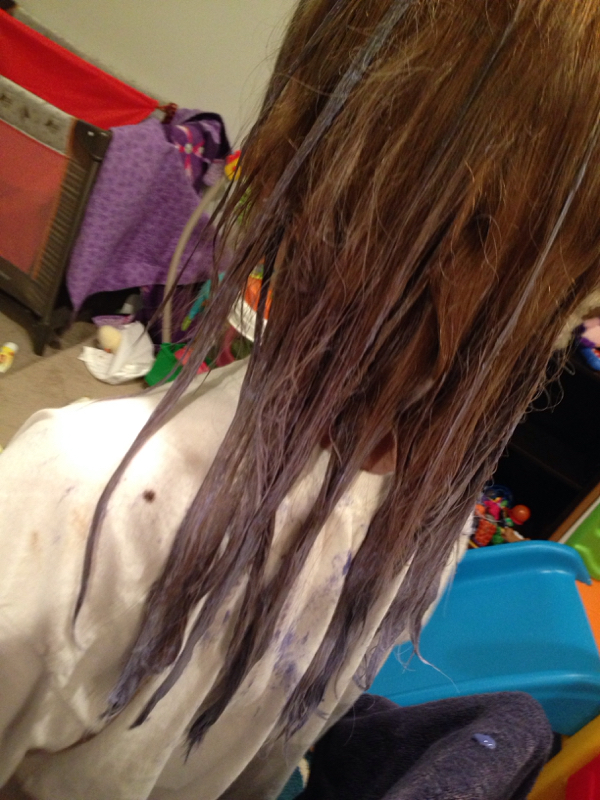 Freestylin' 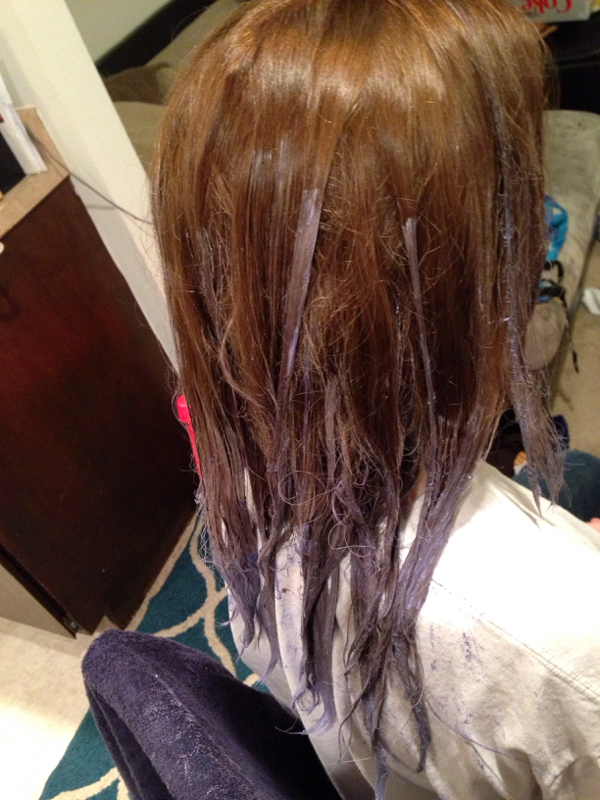 Some light highlights added I decided to work toward the root with some highlighted strips as well, which apparently is called balayage, according to Pinterest. Then we rinsed without shampooing, then went straight into deep conditioning. I started to get nervous. I wasn't sure how long to leave the bleach in and I wasn't sure how quickly it would develop. We used 20 developer. Apparently the numbers 10, 20, 30, and 40 indicate the speed at which the color will develop. I chose a lower number as I wasn't sure how her hair would react and I didn't want to have one side be finished before I had finished applying to the other side of the head.  Deep conditioning All in all, I should have waited longer on the bleach, and I should have worked farther up her hair. The smoothness of blend turned out perfectly though. When it's time to touch this up, it should be a simple fix, and I have a better feel for how long I can leave the bleach in. 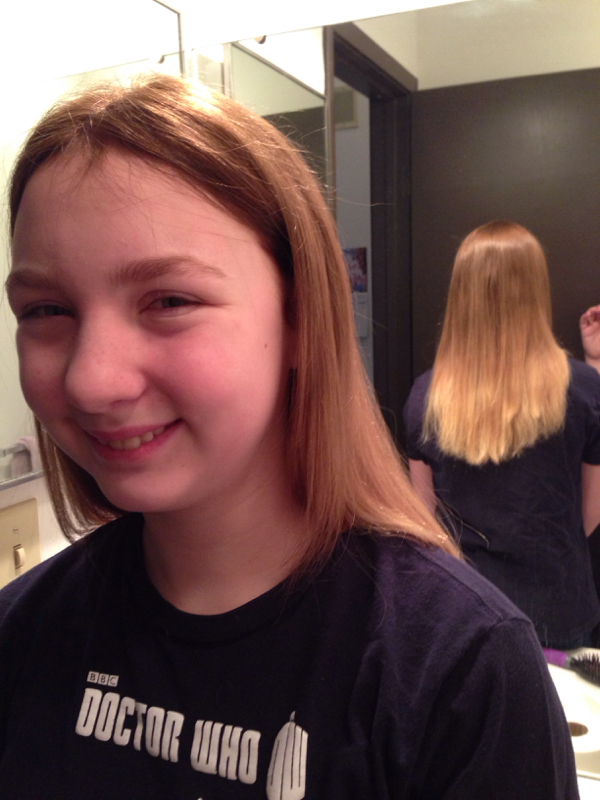 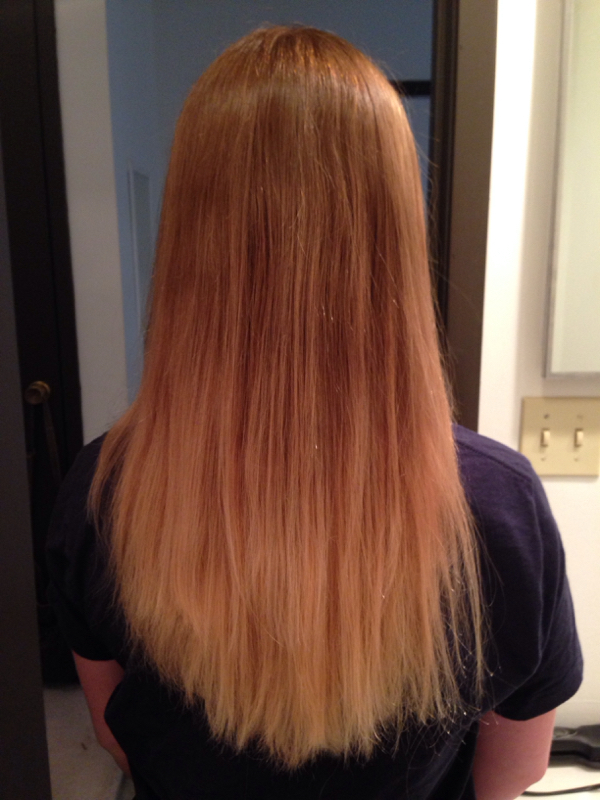 A quick blow dry to check the color 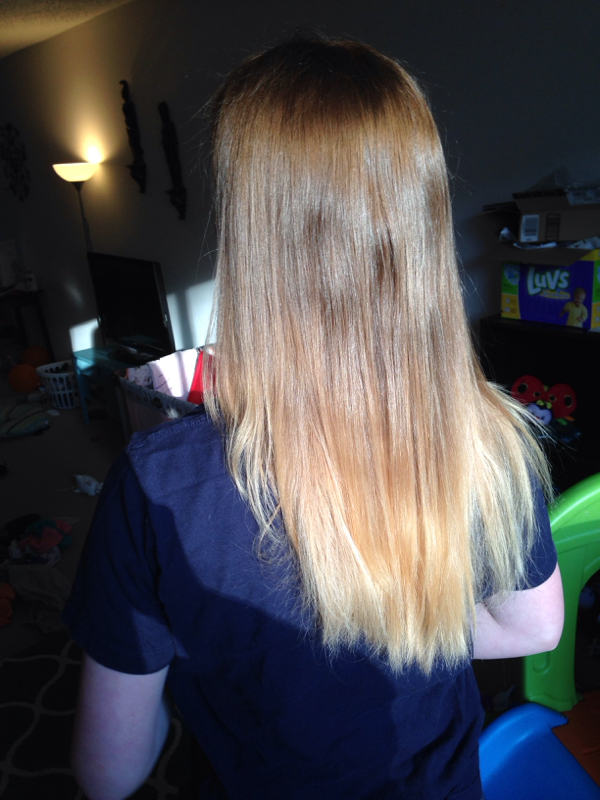 In natural light 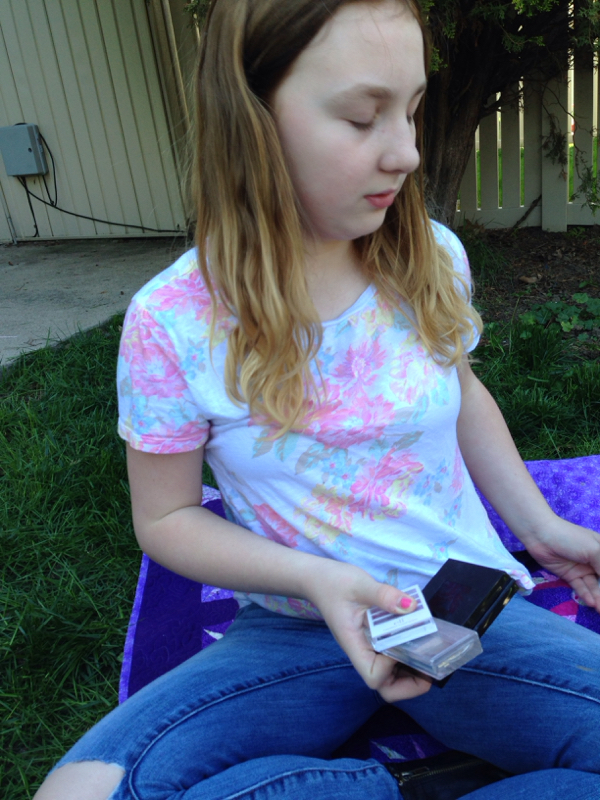 Natural wave and natural light. Annoyed teen.  |
Archives
June 2016
Categories
All
|
 RSS Feed
